Coffee accessories are very good at making a minor inconvenience look like a purchasing emergency.
Over four years in this hobby, I have accumulated tools, used accessories at cafes and friends' homes, bought equipment for other people, accepted recommendations, and 3D-printed solutions of my own. Some objects now support almost every brew. Others cost thousands of rupees and have not left a drawer in months.
My rule today is simple: an accessory should improve repeatability, remove meaningful friction, protect equipment, or make the process more enjoyable. If it does none of those things, it does not become useful merely because a coffee influencer can explain its tolerances.
This is not a list of everything a complete coffee station could contain. It is an account of what survived daily use.
The most useful distinction: better coffee or a better workflow?
Not every worthwhile accessory needs to transform flavour.
My current scale makes brewing more pleasant and reliable, but I would not pretend that every cup became dramatically better the day I bought it. My magnetic dosing funnel mostly prevents mess. My knock box makes espresso cleanup easier. A low-profile drip tray lets a cup fit under my Gaggia Classic Pro.
Those are workflow improvements, and workflow matters. A tool that makes you less reluctant to brew can earn its place without winning a blind tasting.
The problem begins when convenience, consistency, and taste are collapsed into one vague promise of "better coffee." Then every object appears essential.
Scales: start cheap, upgrade for responsiveness
My first scale was a basic food scale I bought in the United States for perhaps 10 to 15 dollars. It measured weight and nothing else. I used my phone as a timer.
That was enough to stop guessing.
I could measure a coffee-to-water ratio, repeat a recipe, and understand whether I had changed dose or yield. The scale was not particularly fast or attractive, but it did the fundamental job.
After returning to India, I bought a larger inexpensive scale because I wanted more room for pour-over servers. It also lacked a timer. In hindsight, the purchase was not especially necessary; it was simply more convenient for the setup I expected to build.
I eventually bought the compact Timemore Black Mirror Nano. It combines weight, timer, flow-rate display, automatic espresso and pour-over modes, quick response, water resistance, and USB-C charging in a body that fits under my espresso machine.
The largest difference is confidence. I press the button and it responds immediately. I can rely on it during an espresso shot or a staged pour without juggling my phone.
What makes a coffee scale better than a kitchen scale?
A dedicated coffee scale may give you:
- Faster response to small changes
0.1 gresolution- A built-in timer
- Automatic timing when liquid reaches the cup
- Flow-rate information for pour-over
- A smaller body that fits an espresso drip tray
- Better resistance to splashes
- Rechargeable power
You do not need those features for your first good cup. A responsive kitchen scale that measures grams can teach ratio perfectly well.
I also cannot justify spending around 130 US dollars on a Bluetooth scale for my current workflow. That amount could fund an AeroPress, a Timemore C2, a basic scale, and coffee. A connected scale may make sense if it needs to communicate with a modified espresso machine or log detailed profiles. I do not have that problem yet.
Verdict: buy a simple scale immediately. Upgrade when speed, fit, or integrated timing becomes an actual annoyance.
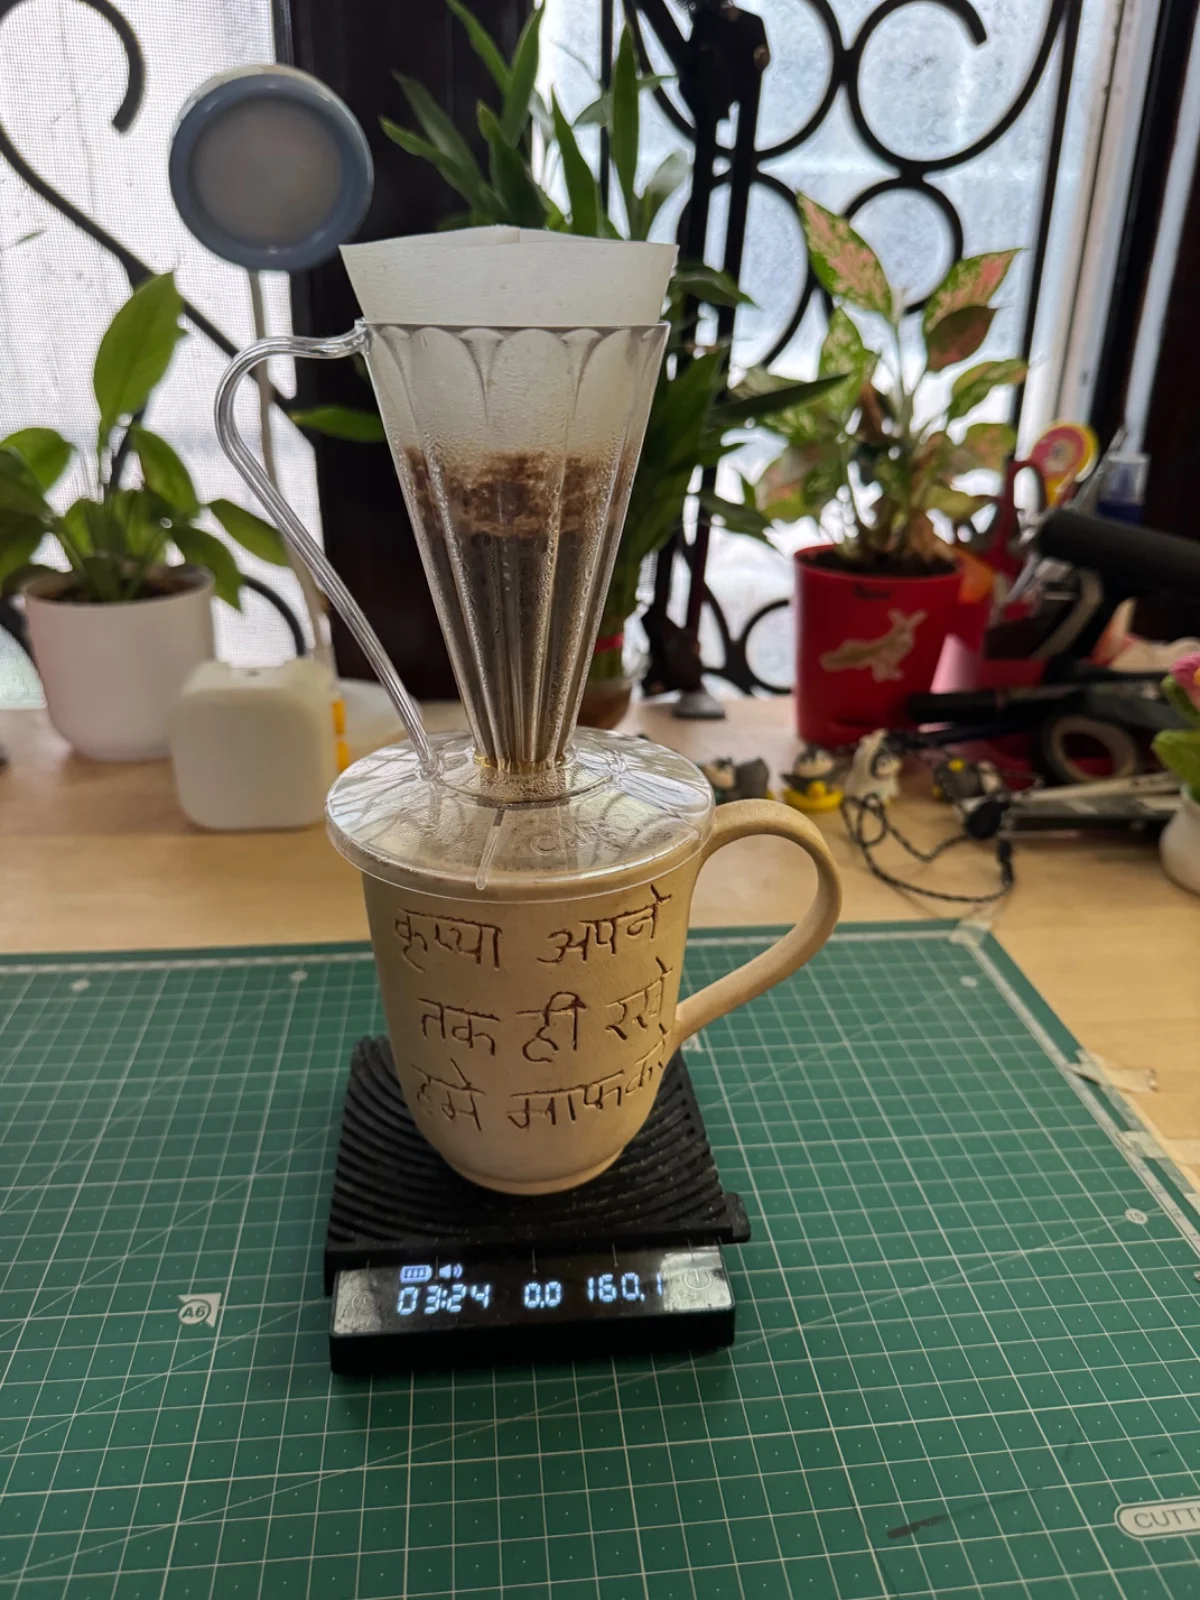
My CAFEC Deep 27 on a scale during a home brew.
Kettles: precision becomes valuable with pour-over
I made good coffee with a normal kettle before buying a temperature-controlled gooseneck.
My workaround was basic: boil water, leave it for a minute or two, and brew once it had cooled into a useful range. It was not precise, but it worked.
The Timemore Fish electric kettle changed the experience more than the fundamental possibility. I can choose a temperature, begin sooner, and pour with much greater control. I later gifted one to my sister because I considered it a long-term tool rather than a temporary upgrade.
Which brewers genuinely benefit from a gooseneck?
Controlled-flow pour-over brewers benefit most:
- Hario V60
- Origami
- CAFEC Deep 27
- Orea
- Kalita Wave
- Similar cone and flat-bottom drippers
With these brewers, pour placement, height, and flow can change agitation and drawdown. A gooseneck makes those variables easier to repeat.
AeroPress and French Press do not require one. They benefit from convenient temperature selection and a pleasant pour, but a normal kettle can wet the grounds perfectly well. The French Press versus pour-over guide explains why one method cares more about your pour than the other.
Verdict: postpone the gooseneck if you brew immersion coffee. Buy one when pour-over becomes a regular practice rather than an imagined future hobby.
Filter papers matter, but buying many creates its own problem
I keep papers for my V60, Origami, CAFEC Deep 27, and AeroPress. They differ in shape, fibre, thickness, and flow.
Hario itself describes paper as an active part of extraction: filters regulate flow, trap fine particles, absorb some oils, and influence clarity and texture. Its standard V60 range includes white and natural-brown papers, while newer products use different fibre structures to change permeability.
I can notice some differences most confidently in a direct comparison. A filter that drains faster or retains more fines can change the recipe. Brown and white papers may also present differently, although rinsing the paper and testing the actual product is more useful than assuming colour alone determines quality.
The practical problem is inventory. If I alternate between four brewers while making one or two coffees a day, each pack lasts a very long time. A year's worth of papers can quietly accumulate around a station.
Buy the correct filter for the brewer you use now. Do not build a paper library in anticipation of every brewer you may own later.
Verdict: filters are essential consumables, not collectible accessories.
Dosing tools: ordinary objects are often enough
The dosing cup included with my Baratza Encore ESP is plain moulded plastic. Baratza lists it as a standard included accessory and sells the same part separately. It transfers coffee into the portafilter without drama.
I do not need a heavy metal replacement to perform the same action.
I also use an inexpensive metal IKEA coffee scoop because I like how it looks and feels. It is not more accurate than the scale. It is simply pleasant and useful.
I tried spraying beans before grinding to reduce static, a method often called the Ross Droplet Technique or RDT. I quickly realised that adding a spray bottle to every dose was not a ritual I enjoyed. A theoretically useful technique still fails if I do not want to perform it.
I do not use bellows on my grinder. If retention bothers me, I tap the grinder rather than adding another attachment.
Verdict: keep the dosing workflow simple until mess or retention becomes measurable enough to bother you.
Espresso accessories: the useful, the optional, and the abandoned
Espresso creates more accessory temptation because puck preparation contains several visible steps. My current workflow includes tools I use daily and others I regret buying.
Magnetic dosing funnel: useful
I place a magnetic funnel on my 58 mm portafilter before transferring grounds. It keeps coffee inside while I distribute it with WDT.
The funnel does not directly extract flavour. It prevents grounds from spilling while making the next step easier. That is enough.
Cheap WDT tool: useful
My Weiss Distribution Technique tool cost roughly ₹200 to ₹300 on Amazon and has six reasonably thin needles. I use it to break clumps and distribute grounds before tamping.
I do not need a mechanised device to perform this task. The inexpensive tool gives me a repeatable routine and takes seconds.
Separate leveler: useful to me, not mandatory for everyone
I use a coffee distributor or leveler every day before tamping. I like the even surface it creates and the way it makes my workflow feel controlled.
That is my preference, not a claim that every espresso drinker needs one. A careful WDT and level tamp may make a separate distributor redundant. Do not add the leveler merely because a workflow diagram shows an empty slot between distribution and tamping.
Heavy conventional tamper: useful
After distribution, I use a simple heavy metal tamper. It feels stable, applies pressure evenly when I hold it level, and has outlasted my interest in more complicated alternatives.
Expensive self-leveling tamper: disappointing
I spent approximately ₹7,000 to ₹8,000 on a tamper designed to sit against the basket edge and stop at a controlled depth. I expected consistency. In practice, I stopped using it and returned to the older heavy tamper.
That purchase still annoys me. It solved a problem that my hands and inexpensive equipment had already solved adequately.
Puck screen and paper filters: useful in my workflow
I use a puck screen and 58 mm paper filters. In my setup, the papers improve the espresso I am getting, while the puck screen also helps keep the group area cleaner.
Placement, basket, dose, grind, and machine all affect what these additions do. Treat them as inexpensive experiments, not universal requirements.
Knock box: essential once espresso is daily
If you make espresso regularly, a knock box removes a recurring annoyance. It gives hot, compact pucks somewhere safe to go and keeps them out of the sink.
It does not improve extraction. It improves the morning.
Cleaning tools that earn their space
Coffee grounds migrate everywhere.
I keep brushes and a small handheld vacuum near the station. The vacuum also has a blower function, which helps move loose grounds from accessible areas before wiping them down. I use it around the station rather than blasting dust deeper into a grinder or machine.
Cleaning tools matter because old coffee oils and grounds can affect flavour and equipment. A small brush, cloth, and the correct cleaner for an espresso machine are more valuable than decorative preparation tools. The coffee-equipment cleaning guide covers the routine in more detail.
Verdict: buy tools that make frequent cleaning easy enough that you actually do it.
Storage: the original bag is usually enough
I spent more money on storage than I needed to.
If I buy a 250 g bag, begin using it after an appropriate resting period, and brew every day, the coffee is already moving through its useful life. Most specialty bags have a resealable closure and one-way valve. I can squeeze out excess air, seal the bag, and store it away from heat, light, and moisture.
That is sufficient for most of my coffee.
I would have saved a meaningful amount of money had I understood this earlier.
Airscape: the container I would buy again
When I do need a canister, I use Airscape. Its inner lid physically pushes excess air out as it moves down towards the coffee, then locks in place. The mechanism is direct, manual, and easy to understand.
It has worked consistently for me. If someone insists on buying a dedicated coffee container, this is the one I recommend from my own collection.
Fellow Atmos: two disappointing units
I bought two Fellow Atmos canisters because the brand had a strong reputation and the containers felt premium. Both eventually stopped holding the seal the way I expected. The indicator would release and I found myself repeatedly recreating the vacuum.
Fellow says its manual Atmos is designed to hold a seal for approximately three to five days and provides instructions for cleaning and reassembling the valve when performance drops. My experience does not prove every Atmos fails. It does mean that my two expensive units are now empty while the Airscape remains in use.
Timemore vacuum container: another disappointment
I also bought a Timemore vacuum container whose sealing function did not remain useful to me. It joined the Fellow canisters in the category of attractive storage that added maintenance without improving my daily coffee enough.
Read how to store coffee beans for freshness before buying a canister. A container cannot make old coffee fresh, and a good resealable bag may already solve your problem.
The accessories I 3D-printed
3D printing is useful because it can solve a specific fit problem without requiring a commercial product.
Low-profile Gaggia drip tray: genuinely useful
The original Gaggia Classic Pro drip tray limited the cup and scale clearance beneath my portafilter. I printed a lower-profile tray, thickened the walls when adapting the design, and still use it.
It solved a visible physical constraint. That is exactly what a custom accessory should do.
Geared WDT tool: clever but unnecessary
I also printed a geared, star-like WDT device. It works. It is interesting to demonstrate. It is too much effort for the one espresso I am usually preparing for myself.
The ₹200–₹300 manual WDT tool won because it is already in my hand and finished before the elaborate tool justifies its existence.
An accessory can be well engineered and still be wrong for your routine.
My useful, postpone, and skip lists
For a pour-over beginner
Buy now:
- A basic gram scale
- The correct paper filters
- A grinder appropriate to your budget
- One brewer
- Any safe kettle you already own
Buy when the limitation becomes obvious:
- Gooseneck kettle
- Temperature control
- Faster coffee scale with timer
- Dedicated server
- Cleaning brush
Skip for now:
- Bluetooth scale
- Multiple drippers
- Several competing filter packs
- Decorative dosing trays
- Premium canister for a bag you finish quickly
The beginner equipment guide explains why the grinder and repeatable recipe matter before a collection of brewers.
For an espresso beginner
Buy now:
- Scale that fits the drip tray
- Properly sized tamper
- Dosing funnel if transfer is messy
- Simple WDT tool
- Knock box
- Group-head brush and suitable cleaning supplies
Experiment with later:
- Puck screen
- Paper filters
- Separate distributor or leveler
- Precision basket
- Low-profile drip tray if clearance is a problem
Skip until you can name the problem:
- Expensive self-leveling tamper
- Mechanised WDT
- Premium dosing cup
- Connected accessories
- Tools bought only because they appear in someone else's preparation video
Espresso has genuine precision requirements. It also creates a market for increasingly elaborate answers to tiny inconsistencies. Learn to understand grinding first, then decide which variable needs help.
How accessory consumerism replaces learning
The part of coffee culture I dislike is the ease with which acquisition can impersonate progress.
Someone can subscribe to beautifully packaged international coffee, buy a new hand grinder, replace a capable brewer, and arrange an impressive station without spending equivalent effort understanding the cup. There is nothing wrong with enjoying design or collecting equipment. The question I keep asking is: do I understand what changed?
At a coffee workshop I conducted in Green Park, one participant was just entering the hobby and asked thoughtful beginner questions. Seven or eight months later, he showed me a setup containing a sophisticated manual-lever espresso machine, pressure and temperature controls, and an expensive grinder. He continued asking what hand grinder to buy next.
He may genuinely enjoy every object, and it is not my job to assess someone else's spending. But the speed of the progression made me examine my own behaviour. Was the next purchase improving understanding, or signalling that I belonged to the hobby?
I own a 1Zpresso J-Ultra and ZP6. I acquired them over time, after going deep enough to understand why I wanted different grinders. Even then, I am not immune.
When Lance Hedrick reviewed the CAFEC Deep 27, I bought one because its small-dose capability sounded perfect for a 10 g evening brew. It has been useful. It was also an influencer-driven purchase made quickly because a new object solved an appealingly specific problem.
The answer is not to declare all equipment bad. The Deep 27 lets me do something I value. The answer is to notice the mechanism: review, desire, justification, purchase, brief excitement, and then another review.
Creators such as Hedrick frequently remind viewers that reviewing equipment is their job and that enjoying a review does not create an obligation to buy the object. That warning is easy to hear and easier to ignore.
A better test before buying
Before purchasing an accessory, ask:
- What specific recurring problem does this solve?
- How often does that problem occur?
- Can something I own already solve it?
- Can I borrow or test the accessory first?
- Will it improve taste, consistency, convenience, or only appearance?
- How will I know whether it worked?
- What could I buy—or experience—instead?
That final question would have helped me. The expensive tamper and storage containers could have funded a holiday.
My final recommendation
Start smaller than the internet suggests.
A scale, grinder, brewer, filters where required, and a kettle can produce excellent coffee. For espresso, add a correctly sized tamper, an inexpensive WDT tool, a funnel if you make a mess, a knock box, and cleaning supplies.
Everything else should wait for a demonstrated need.
Use Brew Tracker or a notebook to record whether the new tool actually changed your results. If you cannot identify the difference after several controlled brews, you have still learned something useful.
Coffee equipment can be beautiful, clever, and pleasurable. Enjoying those qualities is valid. Just do not let a shelf full of solutions prevent you from learning the coffee already in your cup.